TH11 Farming Base – Loot Protection | Practical Copy Base #6
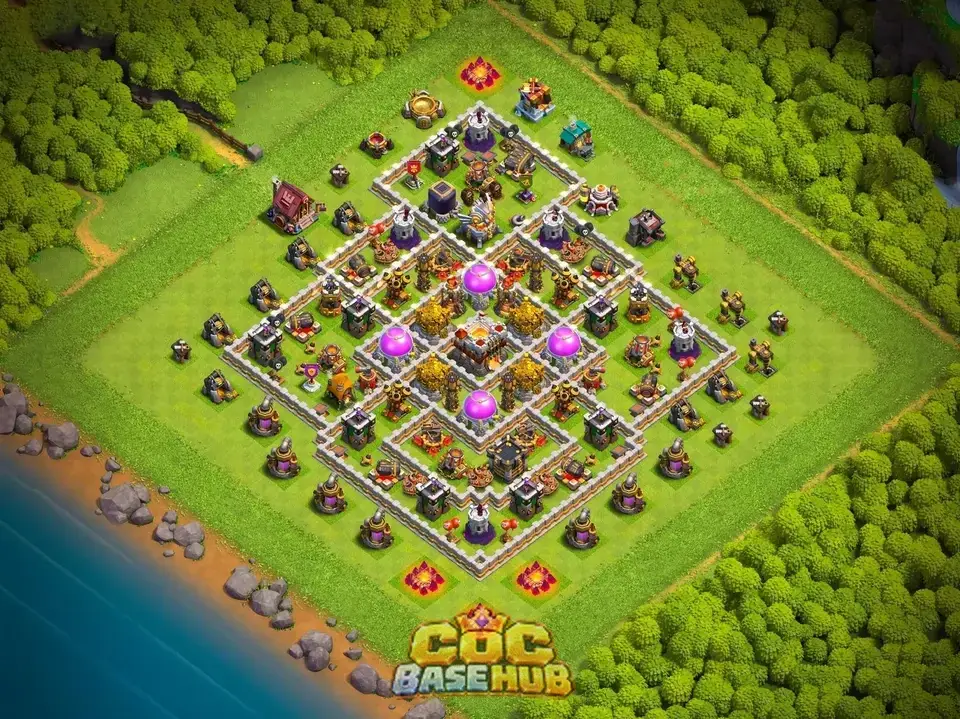
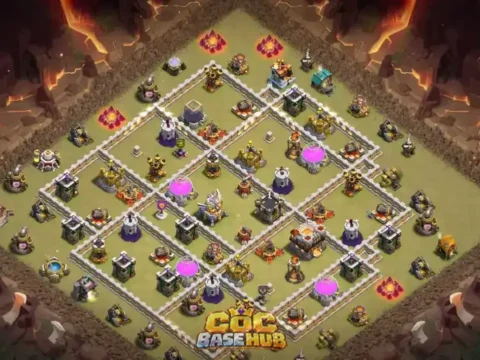
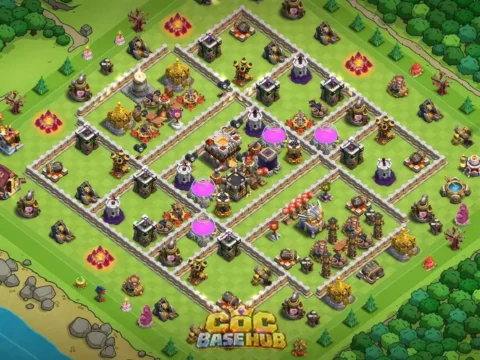
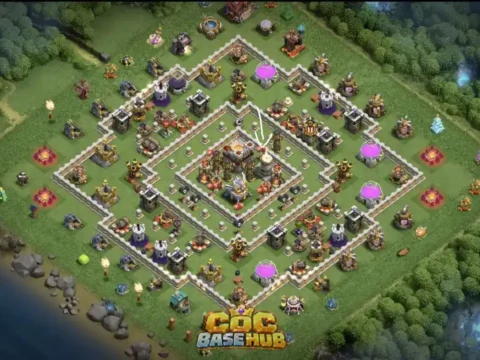
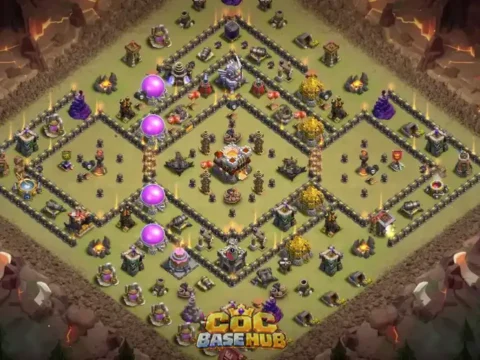
This Town Hall 11 farming layout (base #6) is shared as a Clash of Clans copy-link option for players interested in loot protection. Its practical value should be judged by how it handles the attacks you face, not by an unsupported claim of guaranteed star prevention. The accompanying image and in-game link are the references for its actual building placement; the advice below explains how to evaluate, test, and adapt it without pretending that unseen trap positions have been verified.
Base type: TH11 Farming | Focus: Loot Protection | Layout reference: #6. Use the copy link provided on this page to inspect the village in Clash of Clans.
How attackers may approach this layout for Base #6
For TH11 farming base #6, the focus of this section is how attackers may approach this layout in relation to loot protection. Use the real layout and your own replay results as the source of truth.
A reliable review starts by asking what the attacker must accomplish first. For layout #6, examine a multi-stage ground push with loot protection as the immediate priority. Consider how a skilled attacker can adapt after seeing an apparently strong compartment. In a farming setting, compare this situation with your latest defensive replays and ask what an opponent would gain from choosing a different route. For a copy-link article, this is more useful than repeating generic claims that every layout is unbeatable. Record the first failed assumption and revisit it after your next defense. This checkpoint belongs to the how attackers may approach this layout review for base #6, rather than an assumed placement of any unverified structure.
Action checklist: how attackers may approach this layout
- Open base #6 and identify the relevant buildings before making claims about their locations.
- Run a friendly challenge that stresses a multi-stage ground push.
- Compare the replay with the intended loot protection goal.
- Retest after any meaningful adjustment.
Improvements after failed defenses for Base #6
For TH11 farming base #6, the focus of this section is improvements after failed defenses in relation to loot protection. Use the real layout and your own replay results as the source of truth.
Treat the screenshot as a starting point, not a substitute for a test. For layout #6, examine a predictable funnel with loot protection as the immediate priority. Review whether an attacker can gain several objectives with one spell or hero ability. In a farming setting, compare this situation with your latest defensive replays and ask what an opponent would gain from choosing a different route. A small change in attack timing can completely change the result, even when the visible layout is unchanged. Use this observation to decide which friendly challenge should come next. This checkpoint belongs to the improvements after failed defenses review for base #6, rather than an assumed placement of any unverified structure.
Action checklist: improvements after failed defenses
- Open base #6 and identify the relevant buildings before making claims about their locations.
- Run a friendly challenge that stresses a predictable funnel.
- Compare the replay with the intended loot protection goal.
- Retest after any meaningful adjustment.
Clan Castle and defensive reinforcements for Base #6
For TH11 farming base #6, the focus of this section is clan castle and defensive reinforcements in relation to loot protection. Use the real layout and your own replay results as the source of truth.
When deciding whether to keep this layout, focus on the attacker’s options. For layout #6, examine poison spell commitment with loot protection as the immediate priority. Use replays as evidence, because a screenshot cannot reveal every trap or actual troop interaction. In a farming setting, compare this situation with your latest defensive replays and ask what an opponent would gain from choosing a different route. That distinction matters because attackers can win an exchange at the edge while still losing time later. A single strong defense is encouraging, but several consistent defenses are more informative. This checkpoint belongs to the clan castle and defensive reinforcements review for base #6, rather than an assumed placement of any unverified structure.
Action checklist: clan castle and defensive reinforcements
- Open base #6 and identify the relevant buildings before making claims about their locations.
- Run a friendly challenge that stresses poison spell commitment.
- Compare the replay with the intended loot protection goal.
- Retest after any meaningful adjustment.
Inferno Towers and defensive synergy for Base #6
For TH11 farming base #6, the focus of this section is inferno towers and defensive synergy in relation to loot protection. Use the real layout and your own replay results as the source of truth.
For this specific entry, the useful question is not whether the layout looks intimidating. For layout #6, examine overlapping support defenses with loot protection as the immediate priority. Think about the value of time as well as the value of hit points and defensive damage. In a farming setting, compare this situation with your latest defensive replays and ask what an opponent would gain from choosing a different route. An experienced opponent may choose a different entry, so the conclusion should remain provisional. This is a practical checkpoint before using the layout in a serious war. This checkpoint belongs to the inferno towers and defensive synergy review for base #6, rather than an assumed placement of any unverified structure.
Action checklist: inferno towers and defensive synergy
- Open base #6 and identify the relevant buildings before making claims about their locations.
- Run a friendly challenge that stresses overlapping support defenses.
- Compare the replay with the intended loot protection goal.
- Retest after any meaningful adjustment.
Hero pressure and funnel control for Base #6
For TH11 farming base #6, the focus of this section is hero pressure and funnel control in relation to loot protection. Use the real layout and your own replay results as the source of truth.
The layout is worth examining from more than one approach angle. For layout #6, examine Grand Warden support value with loot protection as the immediate priority. Watch where the first important spell would have to be spent and what that investment accomplishes. In a farming setting, compare this situation with your latest defensive replays and ask what an opponent would gain from choosing a different route. For a copy-link article, this is more useful than repeating generic claims that every layout is unbeatable. Recheck the saved layout after any change to traps or defensive settings. This checkpoint belongs to the hero pressure and funnel control review for base #6, rather than an assumed placement of any unverified structure.
Action checklist: hero pressure and funnel control
- Open base #6 and identify the relevant buildings before making claims about their locations.
- Run a friendly challenge that stresses Grand Warden support value.
- Compare the replay with the intended loot protection goal.
- Retest after any meaningful adjustment.
Mistakes to avoid with this design for Base #6
For TH11 farming base #6, the focus of this section is mistakes to avoid with this design in relation to loot protection. Use the real layout and your own replay results as the source of truth.
The most informative evidence comes from the sequence of decisions in a real replay. For layout #6, examine assuming the base guarantees a result with loot protection as the immediate priority. Look for decisions that force the attacker to commit troops before the full route becomes clear. In a farming setting, compare this situation with your latest defensive replays and ask what an opponent would gain from choosing a different route. A small change in attack timing can completely change the result, even when the visible layout is unchanged. Record the first failed assumption and revisit it after your next defense. This checkpoint belongs to the mistakes to avoid with this design review for base #6, rather than an assumed placement of any unverified structure.
Action checklist: mistakes to avoid with this design
- Open base #6 and identify the relevant buildings before making claims about their locations.
- Run a friendly challenge that stresses assuming the base guarantees a result.
- Compare the replay with the intended loot protection goal.
- Retest after any meaningful adjustment.
Practical testing in friendly challenges for Base #6
For TH11 farming base #6, the focus of this section is practical testing in friendly challenges in relation to loot protection. Use the real layout and your own replay results as the source of truth.
One way to evaluate the design is to follow the battle in stages. For layout #6, examine a Witch-based attack with loot protection as the immediate priority. Start with the opponent’s likely objective rather than with the shape of the walls. In a farming setting, compare this situation with your latest defensive replays and ask what an opponent would gain from choosing a different route. That distinction matters because attackers can win an exchange at the edge while still losing time later. Use this observation to decide which friendly challenge should come next. This checkpoint belongs to the practical testing in friendly challenges review for base #6, rather than an assumed placement of any unverified structure.
Action checklist: practical testing in friendly challenges
- Open base #6 and identify the relevant buildings before making claims about their locations.
- Run a friendly challenge that stresses a Witch-based attack.
- Compare the replay with the intended loot protection goal.
- Retest after any meaningful adjustment.
Ground defense against hybrid armies for Base #6
For TH11 farming base #6, the focus of this section is ground defense against hybrid armies in relation to loot protection. Use the real layout and your own replay results as the source of truth.
Consider the difference between a fast attack and a patient, staged attack. For layout #6, examine Queen Charge entry pressure with loot protection as the immediate priority. Do not confuse a visual impression of symmetry with balanced defensive coverage. In a farming setting, compare this situation with your latest defensive replays and ask what an opponent would gain from choosing a different route. An experienced opponent may choose a different entry, so the conclusion should remain provisional. A single strong defense is encouraging, but several consistent defenses are more informative. This checkpoint belongs to the ground defense against hybrid armies review for base #6, rather than an assumed placement of any unverified structure.
Action checklist: ground defense against hybrid armies
- Open base #6 and identify the relevant buildings before making claims about their locations.
- Run a friendly challenge that stresses Queen Charge entry pressure.
- Compare the replay with the intended loot protection goal.
- Retest after any meaningful adjustment.
Choosing the right defensive objective for Base #6
For TH11 farming base #6, the focus of this section is choosing the right defensive objective in relation to loot protection. Use the real layout and your own replay results as the source of truth.
It helps to separate the intended defensive goal from the result of one battle. For layout #6, examine protecting the Town Hall with loot protection as the immediate priority. When testing, change only one factor at a time so the result is interpretable. In a farming setting, compare this situation with your latest defensive replays and ask what an opponent would gain from choosing a different route. For a copy-link article, this is more useful than repeating generic claims that every layout is unbeatable. This is a practical checkpoint before using the layout in a serious war. This checkpoint belongs to the choosing the right defensive objective review for base #6, rather than an assumed placement of any unverified structure.
Action checklist: choosing the right defensive objective
- Open base #6 and identify the relevant buildings before making claims about their locations.
- Run a friendly challenge that stresses protecting the Town Hall.
- Compare the replay with the intended loot protection goal.
- Retest after any meaningful adjustment.
Reading the base before you copy it for Base #6
For TH11 farming base #6, the focus of this section is reading the base before you copy it in relation to loot protection. Use the real layout and your own replay results as the source of truth.
This aspect of Town Hall 11 defense rewards careful observation. For layout #6, examine noting high-value building clusters with loot protection as the immediate priority. Separate the opening attack from the cleanup phase; a defense can be useful even after the core falls. In a farming setting, compare this situation with your latest defensive replays and ask what an opponent would gain from choosing a different route. A small change in attack timing can completely change the result, even when the visible layout is unchanged. Recheck the saved layout after any change to traps or defensive settings. This checkpoint belongs to the reading the base before you copy it review for base #6, rather than an assumed placement of any unverified structure.
Action checklist: reading the base before you copy it
- Open base #6 and identify the relevant buildings before making claims about their locations.
- Run a friendly challenge that stresses noting high-value building clusters.
- Compare the replay with the intended loot protection goal.
- Retest after any meaningful adjustment.
Frequently asked questions for Base #6
For TH11 farming base #6, the focus of this section is frequently asked questions in relation to loot protection. Use the real layout and your own replay results as the source of truth.
A reliable review starts by asking what the attacker must accomplish first. For layout #6, examine whether this base prevents three stars with loot protection as the immediate priority. A good adjustment should answer a repeatable weakness, not just a single lucky attack. In a farming setting, compare this situation with your latest defensive replays and ask what an opponent would gain from choosing a different route. That distinction matters because attackers can win an exchange at the edge while still losing time later. Record the first failed assumption and revisit it after your next defense. This checkpoint belongs to the frequently asked questions review for base #6, rather than an assumed placement of any unverified structure.
Action checklist: frequently asked questions
- Open base #6 and identify the relevant buildings before making claims about their locations.
- Run a friendly challenge that stresses whether this base prevents three stars.
- Compare the replay with the intended loot protection goal.
- Retest after any meaningful adjustment.
Walls, compartments, and troop routing for Base #6
For TH11 farming base #6, the focus of this section is walls, compartments, and troop routing in relation to loot protection. Use the real layout and your own replay results as the source of truth.
Treat the screenshot as a starting point, not a substitute for a test. For layout #6, examine how defensive buildings influence movement with loot protection as the immediate priority. Compare at least two entry routes before deciding that one side is the obvious weakness. In a farming setting, compare this situation with your latest defensive replays and ask what an opponent would gain from choosing a different route. An experienced opponent may choose a different entry, so the conclusion should remain provisional. Use this observation to decide which friendly challenge should come next. This checkpoint belongs to the walls, compartments, and troop routing review for base #6, rather than an assumed placement of any unverified structure.
Action checklist: walls, compartments, and troop routing
- Open base #6 and identify the relevant buildings before making claims about their locations.
- Run a friendly challenge that stresses how defensive buildings influence movement.
- Compare the replay with the intended loot protection goal.
- Retest after any meaningful adjustment.
What this TH11 layout is designed to do for Base #6
For TH11 farming base #6, the focus of this section is what this th11 layout is designed to do in relation to loot protection. Use the real layout and your own replay results as the source of truth.
When deciding whether to keep this layout, focus on the attacker’s options. For layout #6, examine the opening deployment with loot protection as the immediate priority. Consider how a skilled attacker can adapt after seeing an apparently strong compartment. In a farming setting, compare this situation with your latest defensive replays and ask what an opponent would gain from choosing a different route. For a copy-link article, this is more useful than repeating generic claims that every layout is unbeatable. A single strong defense is encouraging, but several consistent defenses are more informative. This checkpoint belongs to the what this th11 layout is designed to do review for base #6, rather than an assumed placement of any unverified structure.
Action checklist: what this th11 layout is designed to do
- Open base #6 and identify the relevant buildings before making claims about their locations.
- Run a friendly challenge that stresses the opening deployment.
- Compare the replay with the intended loot protection goal.
- Retest after any meaningful adjustment.
Who should use this base for Base #6
For TH11 farming base #6, the focus of this section is who should use this base in relation to loot protection. Use the real layout and your own replay results as the source of truth.
For this specific entry, the useful question is not whether the layout looks intimidating. For layout #6, examine CWL defenders with loot protection as the immediate priority. Review whether an attacker can gain several objectives with one spell or hero ability. In a farming setting, compare this situation with your latest defensive replays and ask what an opponent would gain from choosing a different route. A small change in attack timing can completely change the result, even when the visible layout is unchanged. This is a practical checkpoint before using the layout in a serious war. This checkpoint belongs to the who should use this base review for base #6, rather than an assumed placement of any unverified structure.
Action checklist: who should use this base
- Open base #6 and identify the relevant buildings before making claims about their locations.
- Run a friendly challenge that stresses CWL defenders.
- Compare the replay with the intended loot protection goal.
- Retest after any meaningful adjustment.
Copying, checking, and saving the layout for Base #6
For TH11 farming base #6, the focus of this section is copying, checking, and saving the layout in relation to loot protection. Use the real layout and your own replay results as the source of truth.
The layout is worth examining from more than one approach angle. For layout #6, examine testing before a competitive war with loot protection as the immediate priority. Use replays as evidence, because a screenshot cannot reveal every trap or actual troop interaction. In a farming setting, compare this situation with your latest defensive replays and ask what an opponent would gain from choosing a different route. That distinction matters because attackers can win an exchange at the edge while still losing time later. Recheck the saved layout after any change to traps or defensive settings. This checkpoint belongs to the copying, checking, and saving the layout review for base #6, rather than an assumed placement of any unverified structure.
Action checklist: copying, checking, and saving the layout
- Open base #6 and identify the relevant buildings before making claims about their locations.
- Run a friendly challenge that stresses testing before a competitive war.
- Compare the replay with the intended loot protection goal.
- Retest after any meaningful adjustment.
Town Hall and Eagle Artillery priorities for Base #6
For TH11 farming base #6, the focus of this section is town hall and eagle artillery priorities in relation to loot protection. Use the real layout and your own replay results as the source of truth.
The most informative evidence comes from the sequence of decisions in a real replay. For layout #6, examine the effect of an early objective takedown with loot protection as the immediate priority. Think about the value of time as well as the value of hit points and defensive damage. In a farming setting, compare this situation with your latest defensive replays and ask what an opponent would gain from choosing a different route. An experienced opponent may choose a different entry, so the conclusion should remain provisional. Record the first failed assumption and revisit it after your next defense. This checkpoint belongs to the town hall and eagle artillery priorities review for base #6, rather than an assumed placement of any unverified structure.
Action checklist: town hall and eagle artillery priorities
- Open base #6 and identify the relevant buildings before making claims about their locations.
- Run a friendly challenge that stresses the effect of an early objective takedown.
- Compare the replay with the intended loot protection goal.
- Retest after any meaningful adjustment.
Traps, Teslas, and hidden surprises for Base #6
For TH11 farming base #6, the focus of this section is traps, teslas, and hidden surprises in relation to loot protection. Use the real layout and your own replay results as the source of truth.
One way to evaluate the design is to follow the battle in stages. For layout #6, examine spring-trap opportunities with loot protection as the immediate priority. Watch where the first important spell would have to be spent and what that investment accomplishes. In a farming setting, compare this situation with your latest defensive replays and ask what an opponent would gain from choosing a different route. For a copy-link article, this is more useful than repeating generic claims that every layout is unbeatable. Use this observation to decide which friendly challenge should come next. This checkpoint belongs to the traps, teslas, and hidden surprises review for base #6, rather than an assumed placement of any unverified structure.
Action checklist: traps, teslas, and hidden surprises
- Open base #6 and identify the relevant buildings before making claims about their locations.
- Run a friendly challenge that stresses spring-trap opportunities.
- Compare the replay with the intended loot protection goal.
- Retest after any meaningful adjustment.
Air defense against Electro Dragons for Base #6
For TH11 farming base #6, the focus of this section is air defense against electro dragons in relation to loot protection. Use the real layout and your own replay results as the source of truth.
Consider the difference between a fast attack and a patient, staged attack. For layout #6, examine balloon pathing toward air defenses with loot protection as the immediate priority. Look for decisions that force the attacker to commit troops before the full route becomes clear. In a farming setting, compare this situation with your latest defensive replays and ask what an opponent would gain from choosing a different route. A small change in attack timing can completely change the result, even when the visible layout is unchanged. A single strong defense is encouraging, but several consistent defenses are more informative. This checkpoint belongs to the air defense against electro dragons review for base #6, rather than an assumed placement of any unverified structure.
Action checklist: air defense against electro dragons
- Open base #6 and identify the relevant buildings before making claims about their locations.
- Run a friendly challenge that stresses balloon pathing toward air defenses.
- Compare the replay with the intended loot protection goal.
- Retest after any meaningful adjustment.
Final recommendation for TH11 farming base #6
Use this Clash of Clans Town Hall 11 layout as a starting point for testing, not as a guaranteed result. Copy the base, verify it in-game, check your defensive upgrades, and compare several replays. If you share feedback about base #6, include the army type, entry direction, and observed weakness so that future adjustments remain evidence-based.