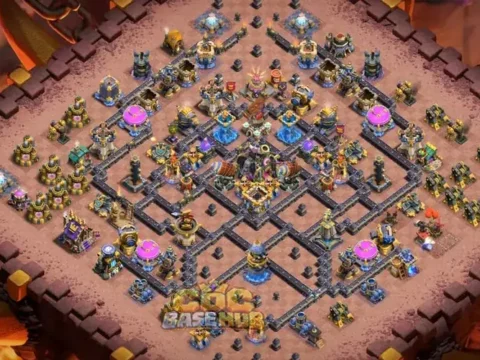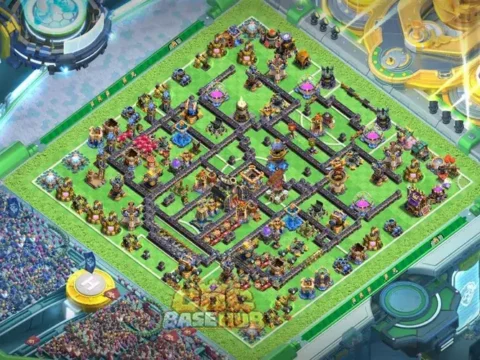
TH19 War Base #20 – Base Layout for Better Planning for Clan War Defense and Defensive TradeoffsNew
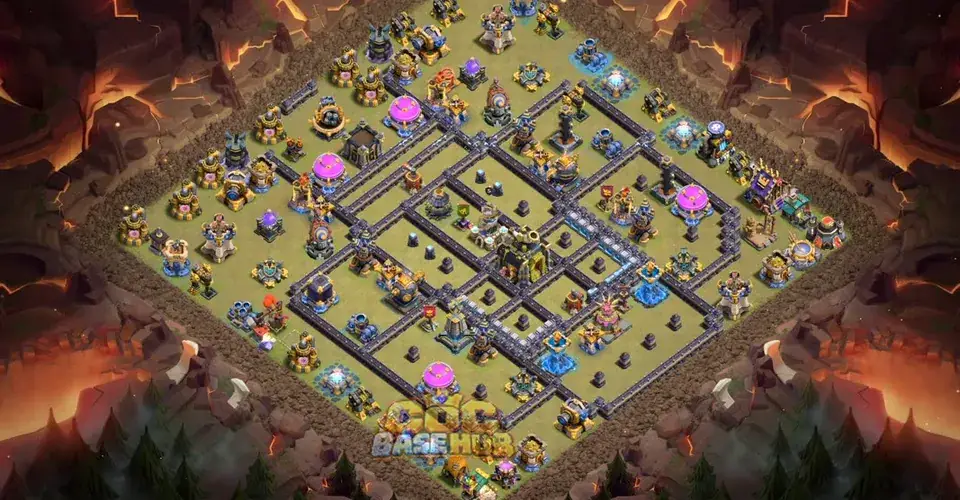
TH19 War Base #20: overview and copy link
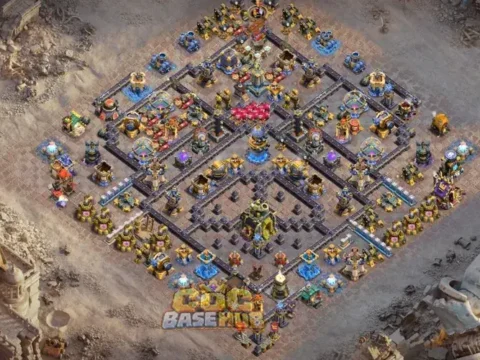
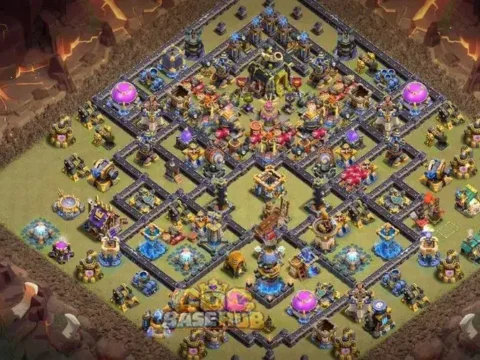
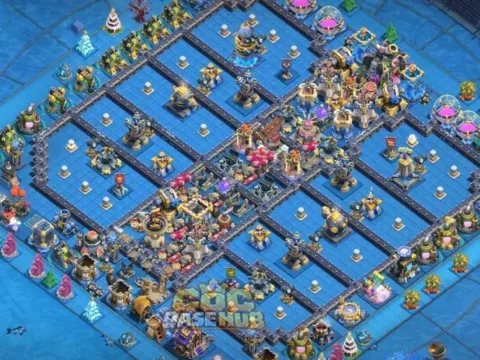
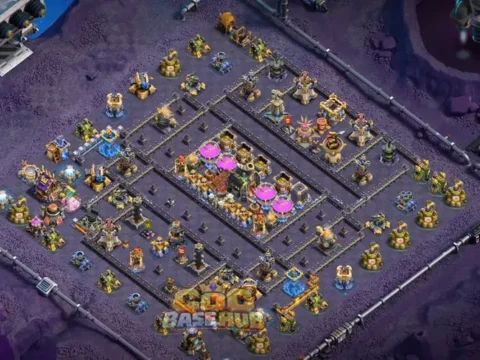
This Clash of Clans Town Hall 19 war base is listed as layout #20 in the COC Base Hub collection. Its intended use is Clan War defense, with an emphasis on protecting stars and a practical review of defensive tradeoffs. You can open the provided in-game copy link to inspect the arrangement directly. Because individual defense results depend on building levels and the opponent, this guide offers a structured way to assess the base rather than claiming a guaranteed result. Choose the layout because it fits your goals and performs in testing, not simply because its thumbnail looks impressive.
Why defensive tradeoffs matters for this TH19 layout
The distinctive evaluation angle for base #20 is defensive tradeoffs. Start by deciding how that topic influences your defensive goal: protecting stars. When you watch a replay, isolate the decisions related to this angle and write down what the attacker gained or sacrificed. For Clan War defense, useful evidence comes from multiple attempts with different army compositions. A single defense cannot establish that the layout is universally strong, but repeated patterns can show whether it deserves a place in your rotation.
Adapting to changing attack trends
Clash of Clans evolves through balance changes, new tactics, and shifting player habits. A layout that performs well today may need reassessment when your opponents change their army composition. Keep the original copy link available and note the date of your most recent tests in your own records. Rather than attaching a calendar year to the page title, evaluate the base against the attacks you actually encounter. That approach keeps the guide useful over time. For this specific entry, base #20, connect that observation to defensive tradeoffs and your objective of protecting stars. A helpful question is whether the opponent had to adapt their plan or could execute the same approach without making a meaningful choice. Keep notes from war replays, then compare this design with another war base before drawing conclusions.
When preparing for war, consider whether opponents have time to study the base and plan a precise opening. A design that surprises casual attackers may behave differently when an organized clan coordinates scouting. Test against deliberate attacks and use the replays to identify whether the layout forces difficult tradeoffs or simply depends on an unfamiliar appearance.
Testing air-based approaches
Air armies create a different set of questions because walls do not determine their movement. Watch the sequence of targeted defenses, the timing of spell support, and the point at which the attacker loses control of the attack. Evaluate whether an attacker can take a predictable route or must react to unexpected pressure. A layout can perform differently against air and ground attacks, so do not treat success against one style as proof of universal protection. For this specific entry, base #20, connect that observation to defensive tradeoffs and your objective of protecting stars. A helpful question is whether the opponent had to adapt their plan or could execute the same approach without making a meaningful choice. Keep notes from war replays, then compare this design with another war base before drawing conclusions.
For Clan War, prioritize the star result over cosmetic symmetry. Discuss this design with clanmates who can reproduce likely attack plans, and compare defenses against both careful two-star attempts and full-clear strategies. War results are influenced by scouting, execution, and the quality of the opponent, so an isolated defensive win is not enough to prove that a layout is dependable.
Balancing visual complexity and performance
An intricate-looking village is not necessarily harder to attack. Some complex layouts expose predictable paths, while simpler arrangements can create meaningful choices. Evaluate the actual movement of troops and the amount of attacker commitment required to reach objectives. Do not let symmetry, decorative patterns, or dramatic screenshots determine your selection. Performance against representative attacks matters more than visual complexity alone. For this specific entry, base #20, connect that observation to defensive tradeoffs and your objective of protecting stars. A helpful question is whether the opponent had to adapt their plan or could execute the same approach without making a meaningful choice. Keep notes from war replays, then compare this design with another war base before drawing conclusions.
When preparing for war, consider whether opponents have time to study the base and plan a precise opening. A design that surprises casual attackers may behave differently when an organized clan coordinates scouting. Test against deliberate attacks and use the replays to identify whether the layout forces difficult tradeoffs or simply depends on an unfamiliar appearance.
Testing ground-based approaches
Ground attacks often depend on a clear route from the first deployment to the central objectives. During a friendly challenge, watch where the main group turns, whether support troops separate, and how early the attacker must invest spells. Compare a direct push with an attack that creates a wide funnel. If both approaches work with little adjustment, you have identified a useful issue to examine before adopting the layout for serious defenses. For this specific entry, base #20, connect that observation to defensive tradeoffs and your objective of protecting stars. A helpful question is whether the opponent had to adapt their plan or could execute the same approach without making a meaningful choice. Keep notes from war replays, then compare this design with another war base before drawing conclusions.
When preparing for war, consider whether opponents have time to study the base and plan a precise opening. A design that surprises casual attackers may behave differently when an organized clan coordinates scouting. Test against deliberate attacks and use the replays to identify whether the layout forces difficult tradeoffs or simply depends on an unfamiliar appearance.
Building a repeatable review habit
Choose a small set of representative attacks and revisit them after major changes. Keep the conditions as comparable as possible and document what changed. One session might focus on hero entry, another on air pathing, and another on late cleanup. By separating questions, you can learn more from each replay without drowning in detail. Over time, this habit makes it easier to identify layouts that suit your clan, league, and personal goals. For this specific entry, base #20, connect that observation to defensive tradeoffs and your objective of protecting stars. A helpful question is whether the opponent had to adapt their plan or could execute the same approach without making a meaningful choice. Keep notes from war replays, then compare this design with another war base before drawing conclusions.
When preparing for war, consider whether opponents have time to study the base and plan a precise opening. A design that surprises casual attackers may behave differently when an organized clan coordinates scouting. Test against deliberate attacks and use the replays to identify whether the layout forces difficult tradeoffs or simply depends on an unfamiliar appearance.
Spell efficiency as a diagnostic
An effective review asks not only whether a spell was used but what value it delivered. Observe where Rage, Freeze, Invisibility, or other relevant support changes the attack. The details vary by army composition and current game balance, so focus on the principle: attackers should have to make choices about timing and resources. A defense that repeatedly allows multiple objectives to fall under one inexpensive commitment deserves closer examination. For this specific entry, base #20, connect that observation to defensive tradeoffs and your objective of protecting stars. A helpful question is whether the opponent had to adapt their plan or could execute the same approach without making a meaningful choice. Keep notes from war replays, then compare this design with another war base before drawing conclusions.
For Clan War, prioritize the star result over cosmetic symmetry. Discuss this design with clanmates who can reproduce likely attack plans, and compare defenses against both careful two-star attempts and full-clear strategies. War results are influenced by scouting, execution, and the quality of the opponent, so an isolated defensive win is not enough to prove that a layout is dependable.
Making a simple defense scorecard
A small scorecard turns subjective impressions into comparisons. Track the opponent army, result, destruction percentage, and one or two observations about the attack route. If you are focused on resources, record the storage losses; if you are focused on competitive stars, record those instead. After several tests, look for the most common failure pattern. This method also helps you explain why one layout is worth keeping while another should be replaced. For this specific entry, base #20, connect that observation to defensive tradeoffs and your objective of protecting stars. A helpful question is whether the opponent had to adapt their plan or could execute the same approach without making a meaningful choice. Keep notes from war replays, then compare this design with another war base before drawing conclusions.
When preparing for war, consider whether opponents have time to study the base and plan a precise opening. A design that surprises casual attackers may behave differently when an organized clan coordinates scouting. Test against deliberate attacks and use the replays to identify whether the layout forces difficult tradeoffs or simply depends on an unfamiliar appearance.
Understanding star outcomes
A two-star defense and a three-star defense are not the same outcome, and the distinction matters when selecting a layout. Review whether the attacker secured the Town Hall, achieved enough destruction for the second star, or cleared the village entirely. For some competitive goals, avoiding a complete clear is the main priority; in others, reducing average destruction matters as well. Match the evaluation to the scoring environment instead of using a single vague claim that a base is unbeatable. For this specific entry, base #20, connect that observation to defensive tradeoffs and your objective of protecting stars. A helpful question is whether the opponent had to adapt their plan or could execute the same approach without making a meaningful choice. Keep notes from war replays, then compare this design with another war base before drawing conclusions.
When preparing for war, consider whether opponents have time to study the base and plan a precise opening. A design that surprises casual attackers may behave differently when an organized clan coordinates scouting. Test against deliberate attacks and use the replays to identify whether the layout forces difficult tradeoffs or simply depends on an unfamiliar appearance.
Hero value and deployment choices
Hero deployment can decide whether an attack becomes a controlled push or a series of disconnected fights. In your tests, record where attackers introduce their heroes and which objectives those heroes reach before the main army arrives. Look for repeated patterns rather than isolated mistakes. If every attacker gets similar value with minimal investment, consider whether the layout fits your intended use or whether a different base would create more meaningful decisions. For this specific entry, base #20, connect that observation to defensive tradeoffs and your objective of protecting stars. A helpful question is whether the opponent had to adapt their plan or could execute the same approach without making a meaningful choice. Keep notes from war replays, then compare this design with another war base before drawing conclusions.
When preparing for war, consider whether opponents have time to study the base and plan a precise opening. A design that surprises casual attackers may behave differently when an organized clan coordinates scouting. Test against deliberate attacks and use the replays to identify whether the layout forces difficult tradeoffs or simply depends on an unfamiliar appearance.
Using the layout alongside upgrades
Your defensive levels influence the result of every test. If your village has unfinished upgrades, avoid interpreting a loss as proof that the arrangement itself is poor. Record whether the attacker exploited a level gap, a placement weakness, or both. As upgrades finish, repeat a few of the same tests. This separates the effect of stronger defenses from the effect of a different layout and makes your decision more informed. For this specific entry, base #20, connect that observation to defensive tradeoffs and your objective of protecting stars. A helpful question is whether the opponent had to adapt their plan or could execute the same approach without making a meaningful choice. Keep notes from war replays, then compare this design with another war base before drawing conclusions.
For Clan War, prioritize the star result over cosmetic symmetry. Discuss this design with clanmates who can reproduce likely attack plans, and compare defenses against both careful two-star attempts and full-clear strategies. War results are influenced by scouting, execution, and the quality of the opponent, so an isolated defensive win is not enough to prove that a layout is dependable.
How to copy the TH19 base layout
Use the copy link supplied with this listing to open Clash of Clans and preview the layout in the game. Make sure you are working with a compatible Town Hall 19 village and review the preview before applying it. If the game does not open, check that it is installed and that the link has not been altered. After copying, compare the in-game layout with the screenshot and run friendly challenges before relying on it in clan war preparation. The link is provided separately in the listing so you can access the original game action without copying an invented URL from the article.
TH19 base selection checklist
- Confirm that the layout opens correctly in Clash of Clans.
- Match the base type to your current game mode and goals.
- Review both air and ground attack replays.
- Track stars, destruction and any relevant resource losses.
- Keep a backup layout before changing your active village.
Frequently asked questions
Is this TH19 war base guaranteed to stop three-star attacks? No. Results vary with attacker skill, troop choices, upgrades, and execution. Should you use it without testing? It is better to try friendly challenges and review several replays first. Can you switch back later? Keep a saved layout so you can compare performance and restore a previous design when needed. Is this page a substitute for a game replay? No: the screenshot and copy link help you inspect the base, while real defensive results tell you how it behaves.
Explore more Clash of Clans base layouts
Browse COC Base Hub for additional Town Hall layouts and copy links. You can also compare your TH19 choices with a TH18 War Base example to understand how defensive priorities differ between Town Hall levels. Choose the layout that matches your current village and test it in-game.