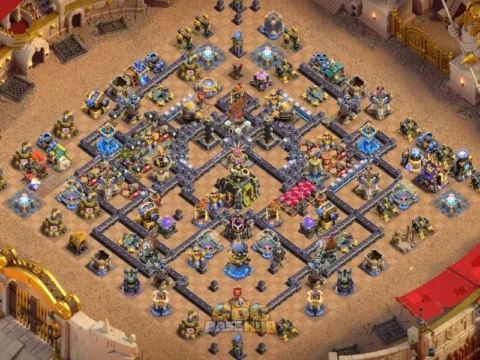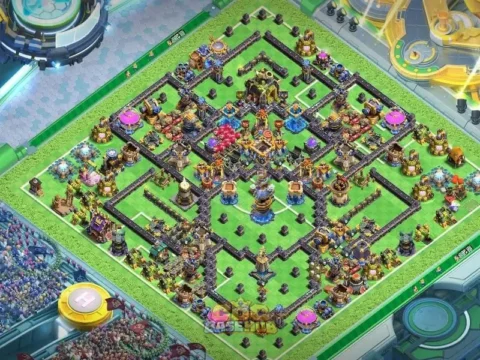
TH19 War Base – Advanced Defense Base for Thoughtful War Preparation #79New
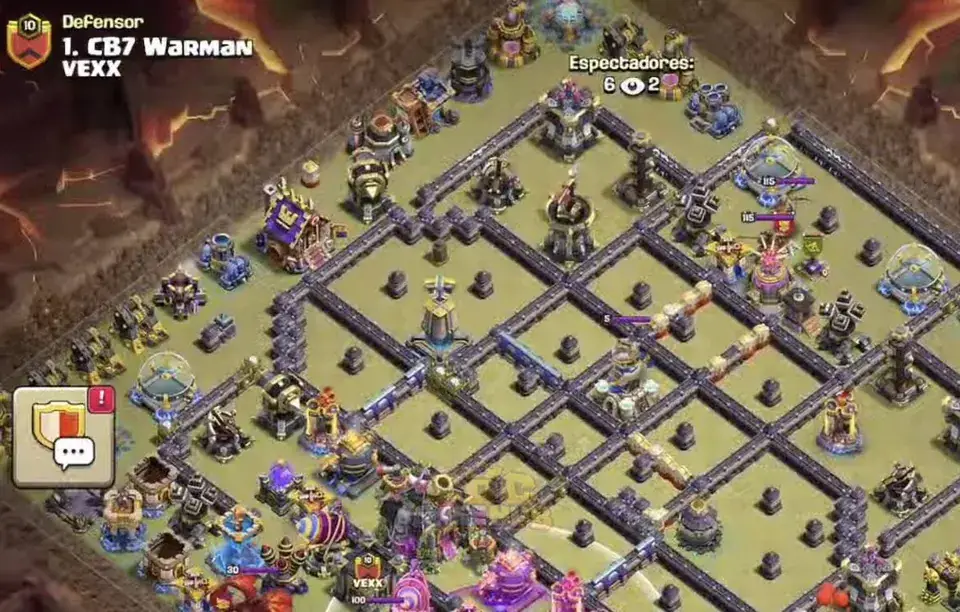
TH19 War Base – Advanced Defense Base for Thoughtful War Preparation #79
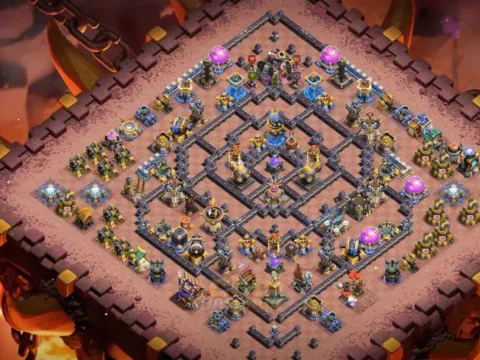
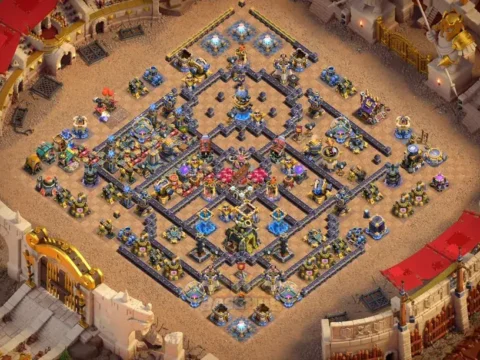
Looking for a Town Hall 19 layout that fits your current Clash of Clans goals? This TH19 war base #79 entry brings together a copyable base link and a practical guide to evaluating defensive performance. Its main use case is reducing the attacker’s chance of an efficient three-star finish. Rather than promise an unbeatable design, this article explains what to inspect, how to test it, and how to decide whether it suits your village.
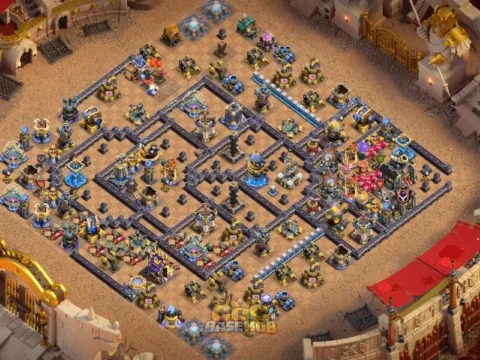
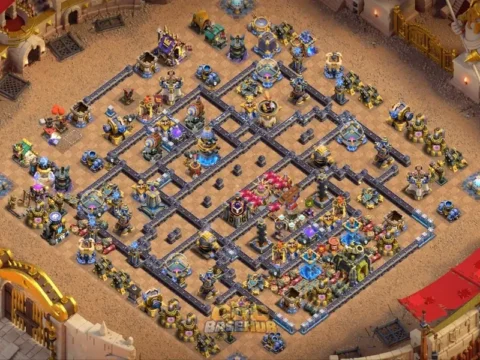
Each Clash of Clans base has its own copy link and image. Before committing to this design, check the image and run friendly challenges to establish how it handles the attack styles common in your clan or league. The guidance below is a decision-making framework; it does not claim that specific buildings are located in particular positions without verifying the screenshot.
How to Test the Layout
Start with a friendly challenge against one air strategy and one ground strategy. Save the replays, note the entry side, identify the first high-value defense removed, and record when the Town Hall is threatened. Then test with a different attacker who has not seen the previous replay. Repeated patterns are more useful than one lucky defense. Reassess after changing defensive levels, hero equipment, or the attacking strategies you encounter.
When reviewing this base, connect replay-based improvement to the actual sequence of an attack. Identify what happens in the opening thirty seconds, when the main army commits, and how much cleanup remains after the critical defenses fall. These stages often explain why two attacks with similar troops achieve different results. Use your own replays to separate layout weaknesses from execution mistakes, and avoid presenting a single defense as proof of universal strength.
Another test for opponent adaptation is to reverse the usual scouting assumption. Instead of asking how the base stops the attack you expect, ask how it responds to an attacker who deliberately changes entry side, timing, or spell investment. This method is especially valuable for reducing the attacker’s chance of an efficient three-star finish because it exposes dependencies that are easy to miss in a static image. Keep conclusions provisional until several attempts support them.
Siege Machines and Core Access
Siege machines can compress the value of walls by opening access to important structures. Examine possible lines from the perimeter toward the center and consider whether a siege route can deliver troops to several major defenses at once. This is a scouting question, not a guarantee about the layout. After using the base in friendly challenges, compare siege entry directions and identify any repeated weakness before deciding whether to keep the design.
For this entry, make clan war preparation the first checkpoint. In practical scouting, look at the relationship between outer buildings, defensive coverage, and the path troops are likely to follow. The objective is reducing the attacker’s chance of an efficient three-star finish, but the image and actual replays—not the title—must determine whether the design achieves that aim. Compare an aggressive opening with a slower funnel and write down which option gives the attacker more control.
A second useful lens is resource efficiency. Try to imagine an opponent choosing the safest side of the village instead of attacking the most visually intimidating section. The relevant question is not simply whether the core has strong defenses; it is whether the attacker can remove the structures that protect it at a reasonable cost. If your friendly challenges reveal a repeatable shortcut, prioritize that evidence over general claims about the layout.
Reading the Base Before You Copy It
Study the screenshot as a defensive map rather than assuming that every base with the same label has identical coverage. Look for where the Town Hall sits relative to the outer buildings, how compartments direct troops, and whether important defenses can be reached from a single entry. Notice where an attacker can create a funnel cheaply, and which areas demand additional spells or heroes. This inspection is the starting point for a useful base choice.
When reviewing this base, connect reinforcement planning to the actual sequence of an attack. Identify what happens in the opening thirty seconds, when the main army commits, and how much cleanup remains after the critical defenses fall. These stages often explain why two attacks with similar troops achieve different results. Use your own replays to separate layout weaknesses from execution mistakes, and avoid presenting a single defense as proof of universal strength.
Another test for defense-to-offense learning is to reverse the usual scouting assumption. Instead of asking how the base stops the attack you expect, ask how it responds to an attacker who deliberately changes entry side, timing, or spell investment. This method is especially valuable for reducing the attacker’s chance of an efficient three-star finish because it exposes dependencies that are easy to miss in a static image. Keep conclusions provisional until several attempts support them.
Practical checkpoint 1: Risk-Adjusted Target Selection
When reviewing this base, connect opening-phase planning to the actual sequence of an attack. Identify what happens in the opening thirty seconds, when the main army commits, and how much cleanup remains after the critical defenses fall. These stages often explain why two attacks with similar troops achieve different results. Use your own replays to separate layout weaknesses from execution mistakes, and avoid presenting a single defense as proof of universal strength.
Another test for funnel stability is to reverse the usual scouting assumption. Instead of asking how the base stops the attack you expect, ask how it responds to an attacker who deliberately changes entry side, timing, or spell investment. This method is especially valuable for reducing the attacker’s chance of an efficient three-star finish because it exposes dependencies that are easy to miss in a static image. Keep conclusions provisional until several attempts support them.
Avoiding Common Evaluation Mistakes
Do not infer anti-three-star performance from a title alone. A copied design may be outdated relative to the attackers you face, and upgraded defenses can change how it performs. Avoid relying on one successful defense, overlooking weak outer-building funnels, or confusing a difficult-looking core with genuine pathing resistance. A practical comparison includes several replays, different army types, and a clear record of what the attacker achieved.
For this entry, make late-attack cleanup the first checkpoint. In practical scouting, look at the relationship between outer buildings, defensive coverage, and the path troops are likely to follow. The objective is reducing the attacker’s chance of an efficient three-star finish, but the image and actual replays—not the title—must determine whether the design achieves that aim. Compare an aggressive opening with a slower funnel and write down which option gives the attacker more control.
A second useful lens is defensive coverage assessment. Try to imagine an opponent choosing the safest side of the village instead of attacking the most visually intimidating section. The relevant question is not simply whether the core has strong defenses; it is whether the attacker can remove the structures that protect it at a reasonable cost. If your friendly challenges reveal a repeatable shortcut, prioritize that evidence over general claims about the layout.
Planning Against Ground Attacks
Ground attacks depend on wall openings, compartment access, troop targeting, and the path heroes take after the first buildings fall. Trace possible entries from several sides. Ask whether a wall break or jump provides immediate access to multiple high-value targets, and whether defensive fire overlaps at the point where the attacker must commit the main army. A useful test is to compare two different ground approaches rather than judge the base from one result.
When reviewing this base, connect attack clock management to the actual sequence of an attack. Identify what happens in the opening thirty seconds, when the main army commits, and how much cleanup remains after the critical defenses fall. These stages often explain why two attacks with similar troops achieve different results. Use your own replays to separate layout weaknesses from execution mistakes, and avoid presenting a single defense as proof of universal strength.
Another test for reinforcement planning is to reverse the usual scouting assumption. Instead of asking how the base stops the attack you expect, ask how it responds to an attacker who deliberately changes entry side, timing, or spell investment. This method is especially valuable for reducing the attacker’s chance of an efficient three-star finish because it exposes dependencies that are easy to miss in a static image. Keep conclusions provisional until several attempts support them.
Keeping the Layout Useful Over Time
A base is not a permanent solution. Changes to balance, army preferences, equipment, and your defensive upgrades can affect outcomes. Keep a short record of recent attacks, including the entry side and final result. When the same approach repeatedly succeeds, compare other TH19 designs and test a replacement. This is more useful than adding a year to the title or claiming that a layout will remain unbeatable.
For this entry, make high-value spell placement the first checkpoint. In practical scouting, look at the relationship between outer buildings, defensive coverage, and the path troops are likely to follow. The objective is reducing the attacker’s chance of an efficient three-star finish, but the image and actual replays—not the title—must determine whether the design achieves that aim. Compare an aggressive opening with a slower funnel and write down which option gives the attacker more control.
A second useful lens is attack sequencing. Try to imagine an opponent choosing the safest side of the village instead of attacking the most visually intimidating section. The relevant question is not simply whether the core has strong defenses; it is whether the attacker can remove the structures that protect it at a reasonable cost. If your friendly challenges reveal a repeatable shortcut, prioritize that evidence over general claims about the layout.
Practical checkpoint 2: Siege Machine Routing
Another test for defense-to-offense learning is to reverse the usual scouting assumption. Instead of asking how the base stops the attack you expect, ask how it responds to an attacker who deliberately changes entry side, timing, or spell investment. This method is especially valuable for reducing the attacker’s chance of an efficient three-star finish because it exposes dependencies that are easy to miss in a static image. Keep conclusions provisional until several attempts support them.
For this entry, make late-attack cleanup the first checkpoint. In practical scouting, look at the relationship between outer buildings, defensive coverage, and the path troops are likely to follow. The objective is reducing the attacker’s chance of an efficient three-star finish, but the image and actual replays—not the title—must determine whether the design achieves that aim. Compare an aggressive opening with a slower funnel and write down which option gives the attacker more control.
Planning Against Air Attacks
Air attacks require attention to Air Defenses, sweepers, and the distance between major defensive threats. A visually impressive design may still offer an easy straight-line approach if key defenses are exposed together. Consider how an attacker could establish a funnel, choose a siege route, and reserve spells for the heaviest resistance. Review actual attack replays before treating any layout as a proven counter to a particular army.
When reviewing this base, connect multi-stage pathing to the actual sequence of an attack. Identify what happens in the opening thirty seconds, when the main army commits, and how much cleanup remains after the critical defenses fall. These stages often explain why two attacks with similar troops achieve different results. Use your own replays to separate layout weaknesses from execution mistakes, and avoid presenting a single defense as proof of universal strength.
Another test for anti-sweep positioning is to reverse the usual scouting assumption. Instead of asking how the base stops the attack you expect, ask how it responds to an attacker who deliberately changes entry side, timing, or spell investment. This method is especially valuable for reducing the attacker’s chance of an efficient three-star finish because it exposes dependencies that are easy to miss in a static image. Keep conclusions provisional until several attempts support them.
Heroes and Ability Timing
Hero abilities can change an attack even when the original funnel looks weak. During replay analysis, mark the moment each hero enters a compartment and what defenses are still active. If the attacker consistently saves an ability until the core, the base may be allowing too much low-risk progress. If abilities are forced early, investigate which defensive interactions caused that pressure. Use these observations to choose among layouts with similar overall shapes.
For this entry, make attack sequencing the first checkpoint. In practical scouting, look at the relationship between outer buildings, defensive coverage, and the path troops are likely to follow. The objective is reducing the attacker’s chance of an efficient three-star finish, but the image and actual replays—not the title—must determine whether the design achieves that aim. Compare an aggressive opening with a slower funnel and write down which option gives the attacker more control.
A second useful lens is resource efficiency. Try to imagine an opponent choosing the safest side of the village instead of attacking the most visually intimidating section. The relevant question is not simply whether the core has strong defenses; it is whether the attacker can remove the structures that protect it at a reasonable cost. If your friendly challenges reveal a repeatable shortcut, prioritize that evidence over general claims about the layout.
Choosing a Base for Your Goal
Choose the layout according to the battles you actually play. War defense prioritizes reducing clean three-star paths, while Legend League requires dependable performance across many matchups. Trophy-focused layouts should be evaluated against the opponents and attack styles you see during pushing. Farming designs must be judged by the resources you want to retain, not only by stars conceded. A base that is effective for one goal is not automatically optimal for another.
When reviewing this base, connect funnel stability to the actual sequence of an attack. Identify what happens in the opening thirty seconds, when the main army commits, and how much cleanup remains after the critical defenses fall. These stages often explain why two attacks with similar troops achieve different results. Use your own replays to separate layout weaknesses from execution mistakes, and avoid presenting a single defense as proof of universal strength.
Another test for funnel stability is to reverse the usual scouting assumption. Instead of asking how the base stops the attack you expect, ask how it responds to an attacker who deliberately changes entry side, timing, or spell investment. This method is especially valuable for reducing the attacker’s chance of an efficient three-star finish because it exposes dependencies that are easy to miss in a static image. Keep conclusions provisional until several attempts support them.
Practical checkpoint 3: Spell Efficiency
For this entry, make attack sequencing the first checkpoint. In practical scouting, look at the relationship between outer buildings, defensive coverage, and the path troops are likely to follow. The objective is reducing the attacker’s chance of an efficient three-star finish, but the image and actual replays—not the title—must determine whether the design achieves that aim. Compare an aggressive opening with a slower funnel and write down which option gives the attacker more control.
A second useful lens is defensive coverage assessment. Try to imagine an opponent choosing the safest side of the village instead of attacking the most visually intimidating section. The relevant question is not simply whether the core has strong defenses; it is whether the attacker can remove the structures that protect it at a reasonable cost. If your friendly challenges reveal a repeatable shortcut, prioritize that evidence over general claims about the layout.
How to Copy and Deploy This TH19 Base
Use the copy-layout link associated with this entry and open it on a device with Clash of Clans installed. Review the imported layout in the village editor before saving or activating it. Check that the game accepts the layout and that your available buildings are placed correctly. If the link fails or opens the wrong Town Hall, do not assume the screenshot and link are equivalent; report the mismatch and use a verified alternative.
For this entry, make scouting accuracy the first checkpoint. In practical scouting, look at the relationship between outer buildings, defensive coverage, and the path troops are likely to follow. The objective is reducing the attacker’s chance of an efficient three-star finish, but the image and actual replays—not the title—must determine whether the design achieves that aim. Compare an aggressive opening with a slower funnel and write down which option gives the attacker more control.
A second useful lens is defensive coverage assessment. Try to imagine an opponent choosing the safest side of the village instead of attacking the most visually intimidating section. The relevant question is not simply whether the core has strong defenses; it is whether the attacker can remove the structures that protect it at a reasonable cost. If your friendly challenges reveal a repeatable shortcut, prioritize that evidence over general claims about the layout.
TH19 War Base #79: Questions Players Ask
Does this base guarantee a successful defense?
No. Defensive results depend on the attacker, available troops, upgrades, timing, and the exact layout. Use multiple replays to assess performance rather than treating the title as a guarantee.
Can I use the layout immediately?
Open the supplied Clash of Clans copy link, inspect the village editor, and confirm the imported design matches your expectations before activating it.
How should I compare similar TH19 bases?
Compare attack replays under similar conditions, including army type, entry direction, and defensive upgrades. Prioritize consistency over a single favorable result.
Explore More Clash of Clans Base Layouts
Browse COC Base Hub for more copyable layouts and compare your options before selecting a permanent defense. You can also explore the COC Base Hub sitemap to find additional published base pages. Use the copy link in this entry for the exact layout associated with TH19 war base #79.