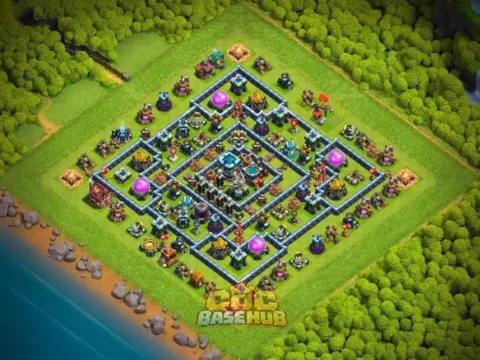
TH13 War Base Anti 2 Star – Battle Tested Approach #97New
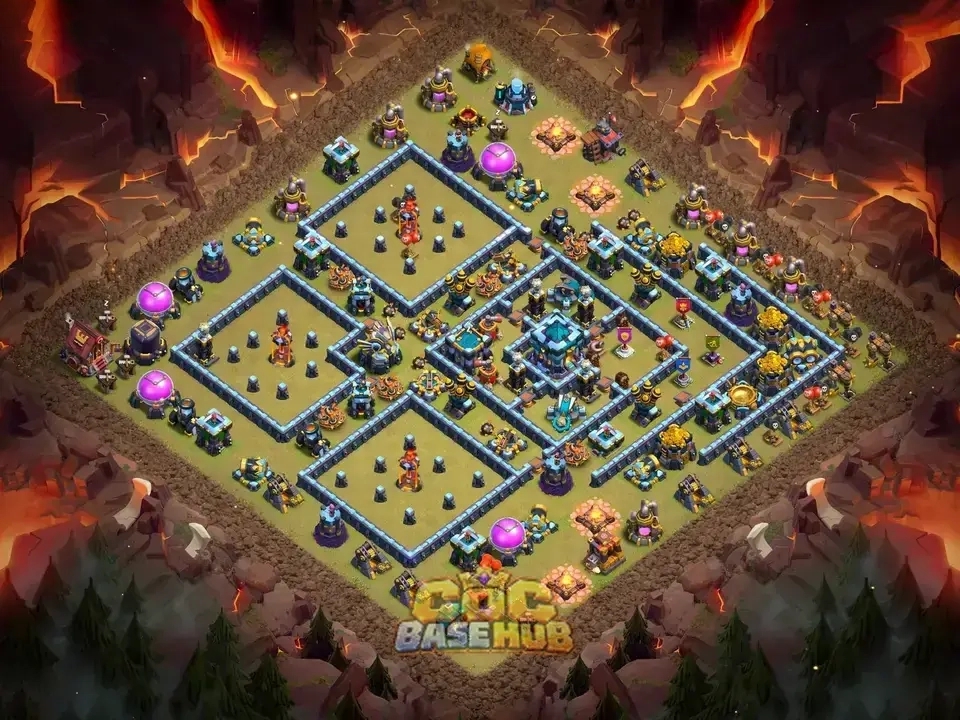
TH13 War Base Anti 2 Star – Battle Tested Approach #97: Town Hall 13 Layout and Copy Link
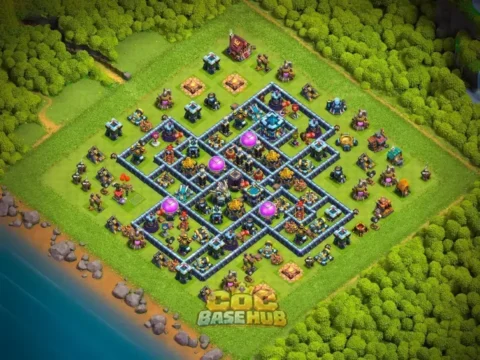
TH13 War Base Anti 2 Star – Battle Tested Approach #97 is a Clash of Clans Town Hall 13 layout shared for players interested in organized Clan War and CWL defense. Use the copy link to load the base into the game, then evaluate it against the attacks you face. The anti-two-star label expresses a defensive intention, not a guarantee of the final star count. This guide discusses TH13 defensive mechanics, sensible testing methods, and ways to decide whether this layout fits your needs; it does not pretend that every building position has been verified from the screenshot.
LavaLoon and Balloon routes for War Base #97
Think about what happens after the first major defense falls. Lava Hounds and Balloons exploit predictable Air Defense routes. A layout should make attackers think about haste timing, air traps, and cleanup support. Examine whether Balloons can travel through several defenses while remaining protected by the same tanking unit. A layout may appear resilient until one compartment opens a direct path to the remaining objectives. In organized Clan War and CWL defense, this can influence how you interpret the result. For this layout, focus on practical decisions rather than claims of guaranteed protection. This question focuses attention on defensive continuity.
Keep adjustments measurable and reversible. Lava Hounds and Balloons exploit predictable Air Defense routes. A layout should make attackers think about haste timing, air traps, and cleanup support. Examine whether Balloons can travel through several defenses while remaining protected by the same tanking unit. Changing many compartments at once makes it difficult to learn which modification helped. For the war base role, the right compromise depends on your current league and opponent pool. Your upgrade levels and opponents can change how this principle plays out. Small experiments produce clearer feedback over time.
Evaluate the same feature from both sides of the battle. Lava Hounds and Balloons exploit predictable Air Defense routes. A layout should make attackers think about haste timing, air traps, and cleanup support. Examine whether Balloons can travel through several defenses while remaining protected by the same tanking unit. What delays one army can sometimes create a convenient funnel for another. When evaluating #97, compare this issue with the other defenses instead of treating it as a stand-alone score. An isolated defensive feature is less useful than its interaction with the surrounding layout. This two-sided check prevents overconfidence in a single defensive trick.
Scattershot coverage for War Base #97
Pay attention to the final cleanup phase. Scattershots are particularly important against clustered troops. Their value depends on target access, nearby compartments, and whether the attacker can eliminate them with an early spell or hero dive. Think about overlapping fire and the consequences of losing one major defense too early. Some attacks survive the core but fail because remaining structures are awkward to reach. In organized Clan War and CWL defense, this can influence how you interpret the result. This topic matters most when it influences the attacker’s spell or troop investment. Cleanup routes can be an important part of the overall design.
Compare the intended goal with the actual replay. Scattershots are particularly important against clustered troops. Their value depends on target access, nearby compartments, and whether the attacker can eliminate them with an early spell or hero dive. Think about overlapping fire and the consequences of losing one major defense too early. Write down which objective the attacker achieved and what it cost in troops or spells. For the war base role, the right compromise depends on your current league and opponent pool. Attack direction can change the apparent value of the same defensive arrangement. The comparison can expose a weakness that is not obvious from a static layout.
Account for differences in opponent skill and upgrades. Scattershots are particularly important against clustered troops. Their value depends on target access, nearby compartments, and whether the attacker can eliminate them with an early spell or hero dive. Think about overlapping fire and the consequences of losing one major defense too early. The same arrangement can face very different results in casual multiplayer and coordinated war. When evaluating #97, compare this issue with the other defenses instead of treating it as a stand-alone score. Because the image has not been individually audited, treat these points as a structured review checklist. Use your own attack history to decide which risks matter.
Clan War and CWL preparation for War Base #97
Pay attention to the final cleanup phase. War defense depends on the opponent roster, scouting habits, and the attacks used in your league. A base that succeeds in ordinary multiplayer may perform differently in organized wars. Review previous enemy attacks and adjust only after identifying a recurring weakness. Some attacks survive the core but fail because remaining structures are awkward to reach. When evaluating #97, compare this issue with the other defenses instead of treating it as a stand-alone score. This topic matters most when it influences the attacker’s spell or troop investment. Cleanup routes can be an important part of the overall design.
Compare the intended goal with the actual replay. War defense depends on the opponent roster, scouting habits, and the attacks used in your league. A base that succeeds in ordinary multiplayer may perform differently in organized wars. Review previous enemy attacks and adjust only after identifying a recurring weakness. Write down which objective the attacker achieved and what it cost in troops or spells. In organized Clan War and CWL defense, this can influence how you interpret the result. Attack direction can change the apparent value of the same defensive arrangement. The comparison can expose a weakness that is not obvious from a static layout.
Account for differences in opponent skill and upgrades. War defense depends on the opponent roster, scouting habits, and the attacks used in your league. A base that succeeds in ordinary multiplayer may perform differently in organized wars. Review previous enemy attacks and adjust only after identifying a recurring weakness. The same arrangement can face very different results in casual multiplayer and coordinated war. For the war base role, the right compromise depends on your current league and opponent pool. Because the image has not been individually audited, treat these points as a structured review checklist. Use your own attack history to decide which risks matter.
Hybrid Miner and Hog Rider attacks for War Base #97
Check whether one investment wins several objectives. Miner and Hog Rider combinations can move quickly through a village after the entry funnel is established. Giant Bomb placement, multi-target damage, and defensive hero positioning all matter. Look for a route that gives attackers too many valuable defenses in one uninterrupted line. An efficient hero entry or siege deployment may remove multiple key defenses at once. For the war base role, the right compromise depends on your current league and opponent pool. Attack direction can change the apparent value of the same defensive arrangement. Identifying that combination gives you a concrete testing priority.
Separate reliable behavior from a lucky outcome. Miner and Hog Rider combinations can move quickly through a village after the entry funnel is established. Giant Bomb placement, multi-target damage, and defensive hero positioning all matter. Look for a route that gives attackers too many valuable defenses in one uninterrupted line. A single failed attack might reflect missed spells or incorrect troop deployment. When evaluating #97, compare this issue with the other defenses instead of treating it as a stand-alone score. Because the image has not been individually audited, treat these points as a structured review checklist. Repeated patterns offer stronger evidence for a defensive adjustment.
Start with the attacker’s first decision. Miner and Hog Rider combinations can move quickly through a village after the entry funnel is established. Giant Bomb placement, multi-target damage, and defensive hero positioning all matter. Look for a route that gives attackers too many valuable defenses in one uninterrupted line. A useful test is to imagine an experienced opponent choosing a side without knowing the hidden traps. In organized Clan War and CWL defense, this can influence how you interpret the result. Use this criterion to decide what to inspect after placing the base in your village. This perspective helps identify easy value before you commit to a change.
- Inspect the relevant defensive range in the village editor.
- Review recent attack replays before changing the arrangement.
- Compare results after a single, measurable adjustment.
Replay review method for War Base #97
Check whether one investment wins several objectives. Review at least several defenses before making a conclusion. Record entry direction, siege choice, spells, Town Hall timing, and which defenses survive longest. Separate poor attacker execution from genuine base strength, because a weak attack is not proof of an exceptional layout. An efficient hero entry or siege deployment may remove multiple key defenses at once. In organized Clan War and CWL defense, this can influence how you interpret the result. An isolated defensive feature is less useful than its interaction with the surrounding layout. Identifying that combination gives you a concrete testing priority.
Separate reliable behavior from a lucky outcome. Review at least several defenses before making a conclusion. Record entry direction, siege choice, spells, Town Hall timing, and which defenses survive longest. Separate poor attacker execution from genuine base strength, because a weak attack is not proof of an exceptional layout. A single failed attack might reflect missed spells or incorrect troop deployment. For the war base role, the right compromise depends on your current league and opponent pool. Treat the idea as a hypothesis to test, not a verified feature of this specific screenshot. Repeated patterns offer stronger evidence for a defensive adjustment.
Start with the attacker’s first decision. Review at least several defenses before making a conclusion. Record entry direction, siege choice, spells, Town Hall timing, and which defenses survive longest. Separate poor attacker execution from genuine base strength, because a weak attack is not proof of an exceptional layout. A useful test is to imagine an experienced opponent choosing a side without knowing the hidden traps. When evaluating #97, compare this issue with the other defenses instead of treating it as a stand-alone score. The copy link provides a starting configuration; actual defense results require testing. This perspective helps identify easy value before you commit to a change.
Copy link and installation for War Base #97
Think about what happens after the first major defense falls. Use the supplied Clash of Clans layout link to open the arrangement in the game, provided your device and game version support the link. Verify the Town Hall level, inspect the layout, and save it to an available slot. If the link fails, check the app version and the original source rather than assuming the layout is invalid. A layout may appear resilient until one compartment opens a direct path to the remaining objectives. When evaluating #97, compare this issue with the other defenses instead of treating it as a stand-alone score. Attack direction can change the apparent value of the same defensive arrangement. This question focuses attention on defensive continuity.
Keep adjustments measurable and reversible. Use the supplied Clash of Clans layout link to open the arrangement in the game, provided your device and game version support the link. Verify the Town Hall level, inspect the layout, and save it to an available slot. If the link fails, check the app version and the original source rather than assuming the layout is invalid. Changing many compartments at once makes it difficult to learn which modification helped. In organized Clan War and CWL defense, this can influence how you interpret the result. Because the image has not been individually audited, treat these points as a structured review checklist. Small experiments produce clearer feedback over time.
Evaluate the same feature from both sides of the battle. Use the supplied Clash of Clans layout link to open the arrangement in the game, provided your device and game version support the link. Verify the Town Hall level, inspect the layout, and save it to an available slot. If the link fails, check the app version and the original source rather than assuming the layout is invalid. What delays one army can sometimes create a convenient funnel for another. For the war base role, the right compromise depends on your current league and opponent pool. Use this criterion to decide what to inspect after placing the base in your village. This two-sided check prevents overconfidence in a single defensive trick.
Siege Machine entry options for War Base #97
Pay attention to the final cleanup phase. Wall Wreckers, Battle Blimps, Stone Slammers, and other available siege choices can bypass expected paths. Evaluate which entry gives the highest defensive value to the attacker and whether the base offers a clear, low-risk siege route. Some attacks survive the core but fail because remaining structures are awkward to reach. For the war base role, the right compromise depends on your current league and opponent pool. Because the image has not been individually audited, treat these points as a structured review checklist. Cleanup routes can be an important part of the overall design.
Compare the intended goal with the actual replay. Wall Wreckers, Battle Blimps, Stone Slammers, and other available siege choices can bypass expected paths. Evaluate which entry gives the highest defensive value to the attacker and whether the base offers a clear, low-risk siege route. Write down which objective the attacker achieved and what it cost in troops or spells. When evaluating #97, compare this issue with the other defenses instead of treating it as a stand-alone score. Use this criterion to decide what to inspect after placing the base in your village. The comparison can expose a weakness that is not obvious from a static layout.
Account for differences in opponent skill and upgrades. Wall Wreckers, Battle Blimps, Stone Slammers, and other available siege choices can bypass expected paths. Evaluate which entry gives the highest defensive value to the attacker and whether the base offers a clear, low-risk siege route. The same arrangement can face very different results in casual multiplayer and coordinated war. In organized Clan War and CWL defense, this can influence how you interpret the result. The safest conclusion comes from several representative replays, not one battle. Use your own attack history to decide which risks matter.
Air Defense and air routes for War Base #97
Pay attention to the final cleanup phase. Air Defense placement affects the routes available to Dragons, Electro Dragons, Balloons, and Lava Hounds. Review whether attackers can destroy multiple Air Defenses from one safe entry and whether their remaining units must cross other damaging zones. The direction of an attack matters as much as raw defense count. Some attacks survive the core but fail because remaining structures are awkward to reach. For the war base role, the right compromise depends on your current league and opponent pool. Treat the idea as a hypothesis to test, not a verified feature of this specific screenshot. Cleanup routes can be an important part of the overall design.
Compare the intended goal with the actual replay. Air Defense placement affects the routes available to Dragons, Electro Dragons, Balloons, and Lava Hounds. Review whether attackers can destroy multiple Air Defenses from one safe entry and whether their remaining units must cross other damaging zones. The direction of an attack matters as much as raw defense count. Write down which objective the attacker achieved and what it cost in troops or spells. When evaluating #97, compare this issue with the other defenses instead of treating it as a stand-alone score. The copy link provides a starting configuration; actual defense results require testing. The comparison can expose a weakness that is not obvious from a static layout.
Account for differences in opponent skill and upgrades. Air Defense placement affects the routes available to Dragons, Electro Dragons, Balloons, and Lava Hounds. Review whether attackers can destroy multiple Air Defenses from one safe entry and whether their remaining units must cross other damaging zones. The direction of an attack matters as much as raw defense count. The same arrangement can face very different results in casual multiplayer and coordinated war. In organized Clan War and CWL defense, this can influence how you interpret the result. This topic matters most when it influences the attacker’s spell or troop investment. Use your own attack history to decide which risks matter.
- Inspect the relevant defensive range in the village editor.
- Review recent attack replays before changing the arrangement.
- Compare results after a single, measurable adjustment.
Traps and surprise value for War Base #97
Pay attention to the final cleanup phase. Seeking Air Mines, Giant Bombs, Spring Traps, Skeleton Traps, and other traps are most useful when placed in likely movement corridors. Review replays to understand where troops actually travel. Avoid copying a trap arrangement blindly when your opponents routinely approach from a different side. Some attacks survive the core but fail because remaining structures are awkward to reach. When evaluating #97, compare this issue with the other defenses instead of treating it as a stand-alone score. Your upgrade levels and opponents can change how this principle plays out. Cleanup routes can be an important part of the overall design.
Compare the intended goal with the actual replay. Seeking Air Mines, Giant Bombs, Spring Traps, Skeleton Traps, and other traps are most useful when placed in likely movement corridors. Review replays to understand where troops actually travel. Avoid copying a trap arrangement blindly when your opponents routinely approach from a different side. Write down which objective the attacker achieved and what it cost in troops or spells. In organized Clan War and CWL defense, this can influence how you interpret the result. An isolated defensive feature is less useful than its interaction with the surrounding layout. The comparison can expose a weakness that is not obvious from a static layout.
Account for differences in opponent skill and upgrades. Seeking Air Mines, Giant Bombs, Spring Traps, Skeleton Traps, and other traps are most useful when placed in likely movement corridors. Review replays to understand where troops actually travel. Avoid copying a trap arrangement blindly when your opponents routinely approach from a different side. The same arrangement can face very different results in casual multiplayer and coordinated war. For the war base role, the right compromise depends on your current league and opponent pool. Treat the idea as a hypothesis to test, not a verified feature of this specific screenshot. Use your own attack history to decide which risks matter.
Strengths and limitations for War Base #97
Consider the sequence rather than isolated buildings. Potential strengths come from layered defensive coverage, inconvenient access, and attack-path uncertainty. Potential limitations include vulnerability to well-planned hero dives, air funnels, or spells. These are evaluation criteria, not verified claims about the exact arrangement, which should be checked visually and through replays. The outcome often depends on what the attacker reaches first, second, and third. When evaluating #97, compare this issue with the other defenses instead of treating it as a stand-alone score. Because the image has not been individually audited, treat these points as a structured review checklist. This avoids treating defensive strength as a simple count of structures.
Focus on the cost of the attacker’s choices. Potential strengths come from layered defensive coverage, inconvenient access, and attack-path uncertainty. Potential limitations include vulnerability to well-planned hero dives, air funnels, or spells. These are evaluation criteria, not verified claims about the exact arrangement, which should be checked visually and through replays. Every extra spell, hero ability, or detour spent on one objective reduces options elsewhere. In organized Clan War and CWL defense, this can influence how you interpret the result. Use this criterion to decide what to inspect after placing the base in your village. A sound layout makes the opponent pay for valuable access.
Look for the simplest low-risk attack plan. Potential strengths come from layered defensive coverage, inconvenient access, and attack-path uncertainty. Potential limitations include vulnerability to well-planned hero dives, air funnels, or spells. These are evaluation criteria, not verified claims about the exact arrangement, which should be checked visually and through replays. An opponent may ignore the strongest compartment and approach through a weaker route. For the war base role, the right compromise depends on your current league and opponent pool. The safest conclusion comes from several representative replays, not one battle. Testing that route is more useful than praising a difficult-looking core.
How to copy and evaluate TH13 War Base Anti 2 Star – Battle Tested Approach #97
Open the layout link supplied with this entry, confirm that Clash of Clans recognizes the Town Hall 13 layout, and save it in a suitable base slot. Test the design against real opponents and adjust it for your available defenses. Remember that the copy link shares a starting arrangement; the defensive result is never guaranteed.