TH19 War Base Anti 3 Star – Tough Attack Routes and Smart Defensive Pressure #10New
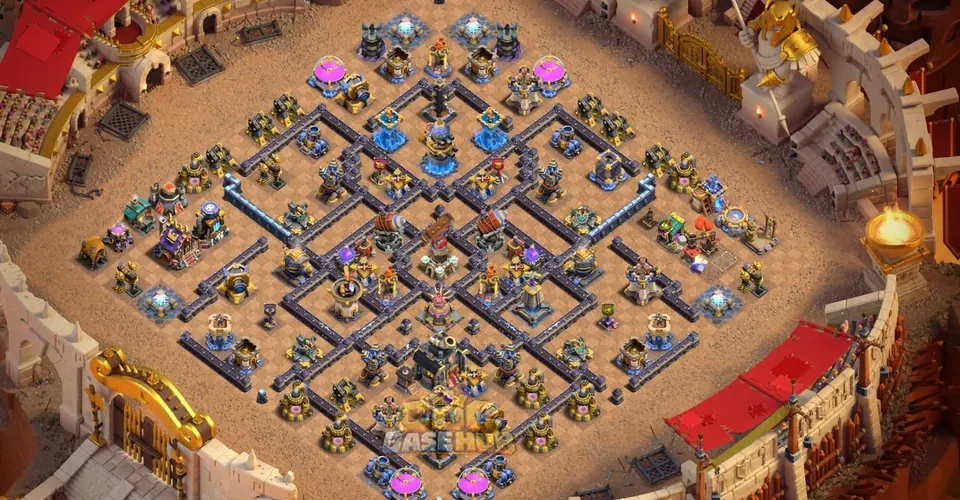
TH19 War Base Anti 3 Star – Tough Attack Routes and Smart Defensive Pressure #10
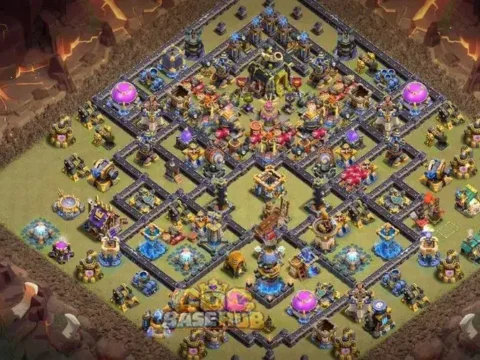
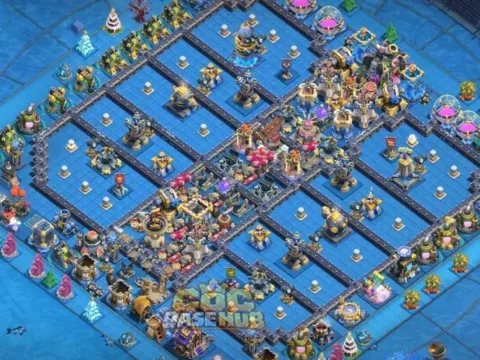
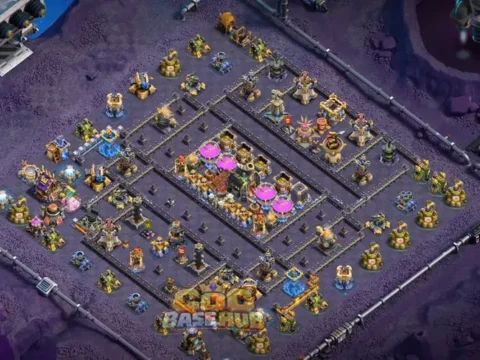
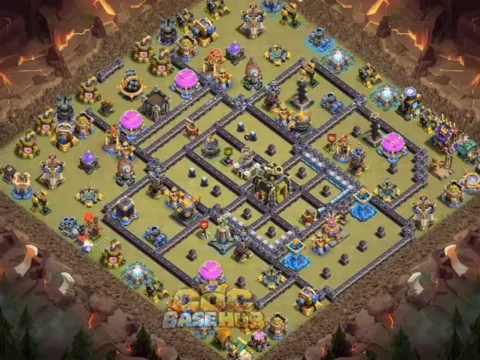
Looking for a Town Hall 19 war base that gives you a useful starting point for clan war planning? This COC Base Hub entry shares a TH19 layout copy link and an evaluation guide centered on forcing a difficult second phase. The layout is presented for players who want to try a new defense, examine its performance, and make decisions from actual replays instead of relying on exaggerated claims.
The label Anti 3 Star describes the intended role of this entry. It does not certify that every attack will fail. Because the arrangement has not been independently audited building by building, this guide focuses on what you can inspect in-game, how to compare likely entry routes, and which observations matter for three-star denial. You can import the base, run tests, and decide whether it suits your own defense history.
Reading the Layout Before Copying
For this TH19 war base #10, approach the question through forcing a difficult second phase. Start by identifying the Town Hall, the likely high-value defensive zones, and the routes troops might take between them. A screenshot is a useful starting point, but a copy link is the only reliable way to inspect the actual arrangement in your village. Look for whether one deployment edge gives easy access to several objectives at once. Then inspect the opposite edge and ask whether the attacker can create a cleaner funnel there. This two-sided reading avoids judging a design from a single attractive angle. In the context of clan war planning, the useful result is not a promise of perfect protection; it is a clearer understanding of what the attacker must spend to reach their objective.
Evaluate the first 30 seconds of an attack separately from the final minute. Early value often determines whether the later push is straightforward. In particular, imagine a war opponent with time to scout and ask what they would do after their first plan meets resistance. The answer helps you judge whether the defensive pressure is sustained or merely delays the first engagement.
The opening decision: Map the two most plausible deployment edges and predict which one gives the attacker a faster path to an objective. Then compare that prediction with real replays. This turns a visual impression into something you can test. Keep the outcome in your war replay so that the next comparison is based on evidence rather than memory. This gives this section a practical role when deciding whether to keep this layout or try another.
Replay-Based Improvement
For this TH19 war base #10, approach the question through forcing a difficult second phase. After each defense, write down the army used, entry side, first major objective taken, spell timing, and the final result. Look for repeated patterns across multiple attacks. A single three-star result does not prove a base is poor, just as one successful hold does not prove it is unbeatable. Use repeatable observations to decide whether to retain, rotate, or replace the design. In the context of clan war planning, the useful result is not a promise of perfect protection; it is a clearer understanding of what the attacker must spend to reach their objective.
Watch how the first hero is used: funneling, removing a key defense, or creating a path for the main force. The same hero can produce very different outcomes. In particular, imagine a war opponent with time to scout and ask what they would do after their first plan meets resistance. The answer helps you judge whether the defensive pressure is sustained or merely delays the first engagement.
Learning from a failed defense: A failed defense can still reveal a useful strength. Perhaps the attacker needed more spells than expected or reached the Town Hall later than planned. Record the meaningful resistance and the exact point where the attack gained momentum. Keep the outcome in your war replay so that the next comparison is based on evidence rather than memory. This gives this section a practical role when deciding whether to keep this layout or try another.
Time and Cleanup
For this TH19 war base #10, approach the question through forcing a difficult second phase. A defense can create problems even after the main objectives are destroyed. Look at how much time the attacker has left when the final phase begins and whether remaining structures require long travel. Time pressure is most meaningful when it follows genuine resistance, not simply a scattered arrangement that sacrifices too much early value. Test with normal army compositions rather than relying on a single failed cleanup. In the context of clan war planning, the useful result is not a promise of perfect protection; it is a clearer understanding of what the attacker must spend to reach their objective.
Check whether the defender benefits from attackers choosing the obvious side. A tempting entry is only useful if it leads to a genuine trade-off. In particular, imagine a war opponent with time to scout and ask what they would do after their first plan meets resistance. The answer helps you judge whether the defensive pressure is sustained or merely delays the first engagement.
Evaluating star objectives: Not every attacker has the same objective. Some seek safe stars, while others attempt a high-risk complete clear. Think about how the design affects both choices and whether it forces an opponent to abandon one goal for the other. Keep the outcome in your war replay so that the next comparison is based on evidence rather than memory. This gives this section a practical role when deciding whether to keep this layout or try another.
Spell Efficiency
For this TH19 war base #10, approach the question through forcing a difficult second phase. Spells can turn an apparently difficult entry into a predictable one. During replay review, note where attackers receive unusually high value from one spell placement. Repeatedly successful spell locations can reveal a structural weakness that is easy to miss in a still image. Compare several attempts rather than changing the base after one unusual replay. In the context of clan war planning, the useful result is not a promise of perfect protection; it is a clearer understanding of what the attacker must spend to reach their objective.
Compare the pressure on ground armies with the pressure on air armies. A one-dimensional review can overlook a major weakness. In particular, imagine a war opponent with time to scout and ask what they would do after their first plan meets resistance. The answer helps you judge whether the defensive pressure is sustained or merely delays the first engagement.
Making a fair comparison: Compare this layout with another TH19 design under similar conditions. The opponent strength, army choice, and execution matter. A small set of controlled observations is more useful than ranking bases from screenshots alone. Keep the outcome in your war replay so that the next comparison is based on evidence rather than memory. This gives this section a practical role when deciding whether to keep this layout or try another.
Understanding Attack Commitment
For this TH19 war base #10, approach the question through forcing a difficult second phase. Attackers spend resources in stages: initial funnel troops, heroes, main army, and spells. A useful defensive review asks which stage the opponent must commit to before seeing the outcome. If the attacker can obtain the Town Hall and the strongest defensive value with one compact push, the remaining base may become a cleanup exercise. If they must choose between objectives, the attack demands more deliberate planning. In the context of clan war planning, the useful result is not a promise of perfect protection; it is a clearer understanding of what the attacker must spend to reach their objective.
Notice whether attacks fail because of the layout or because of poor timing. This distinction matters before making any changes. In particular, imagine a war opponent with time to scout and ask what they would do after their first plan meets resistance. The answer helps you judge whether the defensive pressure is sustained or merely delays the first engagement.
Planning against common army styles: Do not assume that a single army defines the whole defensive environment. Evaluate at least one ground-oriented plan, one air-oriented plan, and one hero-led entry. If the same weak side appears in all three, that is more useful evidence than a single unlucky defense. Keep the outcome in your war replay so that the next comparison is based on evidence rather than memory. This gives this section a practical role when deciding whether to keep this layout or try another.
Air Route Questions
For this TH19 war base #10, approach the question through forcing a difficult second phase. Air attacks bring a different set of decisions. Consider whether an attacker can establish a straight path toward high-value targets or must turn across several defended areas. Check where a blimp or other delivery tactic could be used and what supporting spells would be required. This is a planning checklist, not a claim that the layout automatically counters any specific army. In the context of clan war planning, the useful result is not a promise of perfect protection; it is a clearer understanding of what the attacker must spend to reach their objective.
Consider how a safe percentage strategy differs from a high-risk three-star attempt. Opponents with different goals expose different weaknesses. In particular, imagine a war opponent with time to scout and ask what they would do after their first plan meets resistance. The answer helps you judge whether the defensive pressure is sustained or merely delays the first engagement.
Using defensive logs: Separate outcomes by attack style and entry side. A base that performs reasonably against several approaches may be preferable to one that excels against a single narrow strategy. Use the same observation categories each time. Keep the outcome in your war replay so that the next comparison is based on evidence rather than memory. This gives this section a practical role when deciding whether to keep this layout or try another.
Hero Value and Entry Points
For this TH19 war base #10, approach the question through forcing a difficult second phase. Heroes can remove defenses, create a funnel, or secure a crucial objective. Evaluate what a single hero commitment might gain from each side. A promising defensive design does not necessarily stop heroes completely; it may force a costly choice between gaining percentage and opening a safe route for the main army. Record which side produces the largest payoff in your tests. In the context of clan war planning, the useful result is not a promise of perfect protection; it is a clearer understanding of what the attacker must spend to reach their objective.
Compare the performance of the same layout across different attacking armies before drawing a conclusion. In particular, imagine a war opponent with time to scout and ask what they would do after their first plan meets resistance. The answer helps you judge whether the defensive pressure is sustained or merely delays the first engagement.
Reviewing the final phase: Check the last remaining defenses and structures in close attacks. Ask whether they contributed meaningful pressure or simply survived because of a mistake. This helps separate intentional defensive value from chance. Keep the outcome in your war replay so that the next comparison is based on evidence rather than memory. This gives this section a practical role when deciding whether to keep this layout or try another.
Ground Pathing Questions
For this TH19 war base #10, approach the question through forcing a difficult second phase. For ground armies, pay attention to compartment transitions and whether troops can be pulled away from intended targets. Wall layout matters, but it is not enough to count walls or compartments. Examine possible openings, jump or wall-breaking routes, and how a hero walk could influence troop direction. A practical test is to sketch two plausible ground entries and compare which one demands fewer supporting spells. In the context of clan war planning, the useful result is not a promise of perfect protection; it is a clearer understanding of what the attacker must spend to reach their objective.
Review whether late-game cleanup requires backtracking. Time-consuming travel can matter in close defenses. In particular, imagine a war opponent with time to scout and ask what they would do after their first plan meets resistance. The answer helps you judge whether the defensive pressure is sustained or merely delays the first engagement.
Defensive trade-offs: A layout often makes one area easier to reach in exchange for protecting another. Decide whether that trade-off supports the stated purpose of this base. For a war defense, the cost of conceding an easy two-star may differ from the cost of exposing a full three-star route. Keep the outcome in your war replay so that the next comparison is based on evidence rather than memory. This gives this section a practical role when deciding whether to keep this layout or try another.
Scouting From the Attacker Perspective
For this TH19 war base #10, approach the question through forcing a difficult second phase. Pretend you are planning an attack against your own village. Which side looks simplest? Where can a funnel be created cheaply? Which objective is hardest to reach without overcommitting? This exercise is especially useful when choosing between several copied bases. The best option for your account is the one that fits the opponents and attack styles you actually encounter. In the context of clan war planning, the useful result is not a promise of perfect protection; it is a clearer understanding of what the attacker must spend to reach their objective.
Compare a conservative entry with an aggressive direct push. A layout may resist one approach while exposing weaknesses to the other. In particular, imagine a war opponent with time to scout and ask what they would do after their first plan meets resistance. The answer helps you judge whether the defensive pressure is sustained or merely delays the first engagement.
Keeping the layout practical: The best layout for a player is one they can import, understand, and monitor. Avoid changing multiple elements at once after a bad replay, because that makes it difficult to know which change helped. Compare results in similar conditions. Keep the outcome in your war replay so that the next comparison is based on evidence rather than memory. This gives this section a practical role when deciding whether to keep this layout or try another.
How to Copy This TH19 Base Layout
- Use the Copy Base link associated with this TH19 entry.
- Allow Clash of Clans to open and choose an available village layout slot.
- Inspect the imported layout before activating it, especially if you maintain separate war and home layouts.
- Test it with suitable attacks and check defensive replays before judging results.
To explore more layouts, visit COC Base Hub. You can also compare ideas from the TH18 anti-three-star war base example, while remembering that a TH18 layout is not a substitute for a TH19 design.
Frequently Asked Questions About This TH19 War Base
Is this base guaranteed to prevent three stars?
No. A copied layout does not guarantee a result against every army or player. Test it against the attacks you actually face and evaluate patterns across several replays.
Can I use this design outside its main category?
You can experiment, but its listed purpose is clan war planning. A layout that is useful in one setting may prioritize different outcomes than another mode.
Why does the copy link matter?
The link allows you to import the arrangement in Clash of Clans rather than reconstructing it from a screenshot. Check the imported village before using it competitively.
How should I decide whether to keep it?
Review your war replay, the opponents you faced, and whether repeated attacks exploited the same entry route. A few relevant replays provide a better basis for judgment than an isolated defense.
Final assessment: TH19 war base #10 is best treated as a layout to copy, test, and compare. Its main editorial focus is forcing a difficult second phase, with special attention to three-star denial. Use the import link, inspect the actual placement, and let replay evidence determine whether it belongs in your rotation.